Javelin throw: How to throw farther, safer, and smarter
Want to add distance to your javelin throw without risking injury? The javelin is part power, part rhythm and part simple physics. Mastering the basics—grip, run-up, release and recovery—makes the biggest difference fast.
Grip and javelin choice matter. Use the Finnish (four-finger) grip for power or the American (three-finger) grip for control. Pick a javelin weight that matches your age and level: senior men 800g, senior women 600g. A stiffer javelin suits stronger throwers; a more bendy model helps those who rely on technique.
Run-up and technique
Your run-up builds speed and positions your body. Start with a relaxed 8–12 step approach, increasing tempo in the last five strides. Focus on a steady posture: chest up, eyes on the sector, and arm relaxed. The crossover phase (last three steps) sets your hips and shoulder line. Keep your non-throwing arm pointing where you want to throw—this helps rotation.
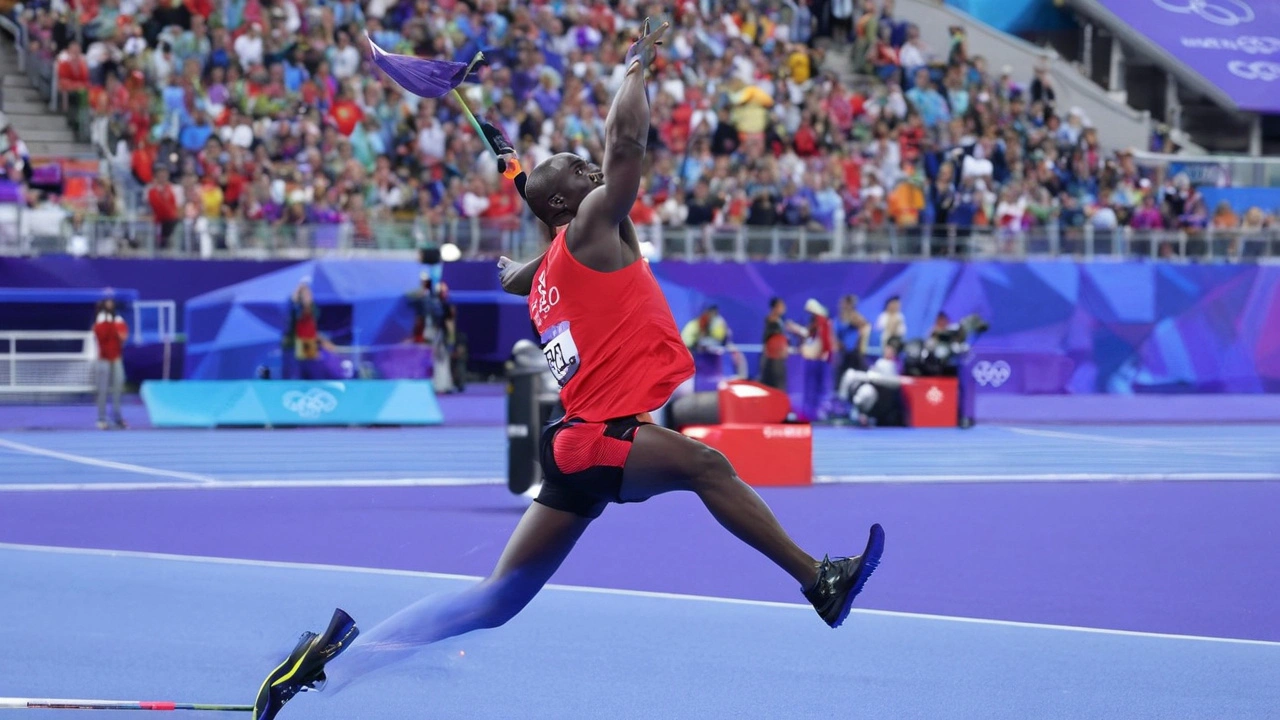
The final plant and release are crucial. Plant your front foot slightly closed, transfer weight from back to front, and drive your hips forward. Snap your elbow and pull the javelin with your shoulder and torso, not only the arm. Aim for a release angle between 30–36 degrees; elite throwers often fine-tune this by feel and wind.
Training, drills and common mistakes
Train explosiveness and mobility. Do medicine-ball throws, single-leg hops, and hip-rotation drills twice a week. Add core work and shoulder stability—band rotations, plank variations, and floor presses help. Practice short run-ups with three-step throws to refine rhythm before full throws.
Watch for common mistakes: opening the chest too early, letting the elbow drop, or planting the foot too flat. These cause loss of power and can lead to shoulder or groin injuries. Video your throws to spot technical leaks—compare slow-motion to pro examples to see what to change.
Safety and competition rules you must know: never throw outside the defined sector (28.96 degrees). Officials measure from the closest landing point to the arc. Wear shoes with good grip and avoid overuse—limit intense throwing days to two per week and allow 48–72 hours recovery for heavy sessions.
Want motivation? Look at elite names: Jan Železný, Barbora Špotáková and Neeraj Chopra. Study their motion: smooth run-ups, sharp hip drive, and clean releases. Use their videos as templates, not perfect copies—each body is different.
If you coach or train alone, keep a weekly log: throws, drills, soreness, and wind conditions. Small consistent changes beat random hard sessions. Follow rules, protect your body, and focus on rhythm—distance will follow.
Warm up with dynamic drills: arm circles, band pulls, hip swings, and light throws to 50% effort. Spend 15–20 minutes before heavy sessions, and cool down with gentle jogging and shoulder stretches. Consistent warm-ups cut injury risk and improve power.
Track simple stats: best throw, average of five throws, and foul rate. Aim to improve one metric each month—more stable averages beat occasional big throws. Small, steady gains show what training actually does.
Throw smart, stay consistent.

